Prior Authorization Widget
The Prior Authorization Widget allows payers and providers to streamline the creation of authorizations and pre-authorizations. Through this widget, users can search for beneficiaries, input diagnoses, and add the products or services prescribed to the patient by their physician.
The widget also previews the information before the results are sent to the patient and the payer is notified.
This guide provides a detailed overview of implementing and using the Prior Authorization Widget effectively.
Prerequisites
Before implementing the widget, ensure you have the following information:
| Name | Description | Example |
|---|---|---|
| Access Token | An access token obtained via our OAuth 2.0 server. Tokens must be obtained by your backend system. | 62ca1647-33c0-493d-b19f-69f1dc1785ec |
| Sponsor Slug | A unique slug provided by Osigu to identify the sponsor. | gt-test-sponsor |
| External Transaction ID | A reference ID from the host application to identify the transaction being processed. This value will be returned by the widget. | ABC12345 |
| Provider Slugs | Optional. A list of provider slugs to filter medications shown by specific providers. | gt-mi-farmacia |
| Product Type Slugs | Specify the product type for initialization. For medications, use drug. | drug |
| Primary Color | Hexadecimal value for the primary color of the widget controls (e.g., buttons, text fields). | #2fa6ff |
| Error Color | Hexadecimal value for the error color used in alerts. | #ee6f6f |
Installation
To integrate the Prior Authorization Widget into your website, follow these steps:
1. Include the Osigu JS Library
Add the following <script> tag to the <head> section of your website.
<HTML>
  <HEAD>
  </HEAD>
  <BODY>
    <script type="text/javascript"
    src="https://preauthorization.widgets.osigu.com/sandbox/0.1.0/widget.js">
    </script>
  </BODY>
</HTML>
2. Create an Instance of the Widget
Create an instance of the widget by initializing it with the required parameters. Below is an example of a widget configured for medication requests:
<HTML>
  <HEAD>
  </HEAD>
  <BODY>
    <script type="text/javascript"
    src="https://preauthorization.widgets.osigu.com/sandbox/0.1.0/widget.js">
    </script>
    <noscript>
      <strong>Lo sentimos pero este sitio no trabaja apropiadamente sin JavaScript. Por favor habilitelo para continuar.</strong>
      <div id="widget_container"></div>
      <script>
        PreAuthorizationWidget.createWidget({
            containerId: "widget_container",
            primaryColor: "#2fa6ff",
            errorColor: "#ee6f6f",
            clientId: "gt-test-sponsor-application-slug",
            clientSecret: "9a1b783b-a5d5-4194-8d10-ba15906e3bb0",
            sponsorSlug: "gt-test-sponsor",
            showBeneficiaryLookupForm: false,
            showDiagnosesForm: false,
            generateAuthorization: false,
            externalTransactionId: 'ABC12345',
            productTypes: ['drug'],
            beneficiaryLookupForm: {
                formSlug: 'DNI',
                inputs: [{
                    slug: "policy_id",
                    value: "123456"
                },
                {
                    slug: "dni",
                    value: "2515-39842-0202"
                }]
            },
            providerSlugs: ['gt-mi-farmacia'],
            productTypes: ['drug']
        });
        const container = document.getElementById('widget_container')
        container.addEventListener("onPreauthorizationItemAdded", function (e) {
            console.log(e.detail); // Prints "Example of an event"
        });
        1
        container.addEventListener("onPreauthorizationItemDeleted", function (e) {
            console.log(e.detail); // Prints "Example of an event"
        });
    </script>
    </noscript>
  </BODY>
</HTML>
La instancia del ejemplo se realizó utilizando los valores de ejemplo que se detallaron al inicio de esta guía, pero para cada Sponsor se deberán utilizar los valores entregados con cada uno.
A continuación platicaremos de algunos atributos importantes.
containerId
Este parámetro es el nombre de la tag de su página WEB en donde desea que el widget sea desplegado.
Puedes tener varias intancias del widget inicializándose en diferentes tags de su página, eso es útil si en tu sitio tienes una sección para medicamentos, otra para laboratorios y otra para procedimientos ambulatorios, por ejemplo.
showBeneficiaryLookupForm
Esta atributo deberá de ir siempre con el valor falso, de lo contrario el widget (en futuras versiones) aparecerá una sección de búsqueda de beneficiario. Este parámetro es funcional si el widget es el encargado de solicitar una autorización.
showDiagnosesForm
Esta atributo deberá de ir siempre con el valor falso, de lo contrario el widget (en futuras versiones) aparecerá una sección de búsqueda de diagnóstico. Este parámetro es funcional si el widget es el encargado de solicitar una autorización.
generateAuthorization
Esta atributo deberá de ir siempre con el valor falso, de lo contrario el widget (en futuras versiones) aparecerá botón con el cuál el widget solicitará una autorización.
externalTransactionId
Este es un identificador de la transacción que esta siendo generada de lado de tu aplicación (Host), será devuelta por el evento disparado por el widget y te puede ser últil para identificar la transacción de tu lado sobre la cuál se esta trabajando.
AtenciónEn el ejemplo seguido del dominio se puede observar el nombre del ambiente
sandbox, seguido por la versión del widget y el nombre del script. Cuando realice un despliegue a su ambiente productivo la URL del script debe de cambiar a algo como esto:
https://preauthorization.widgets.osigu.com/production/0.1.0/widget.js
Using the Widget
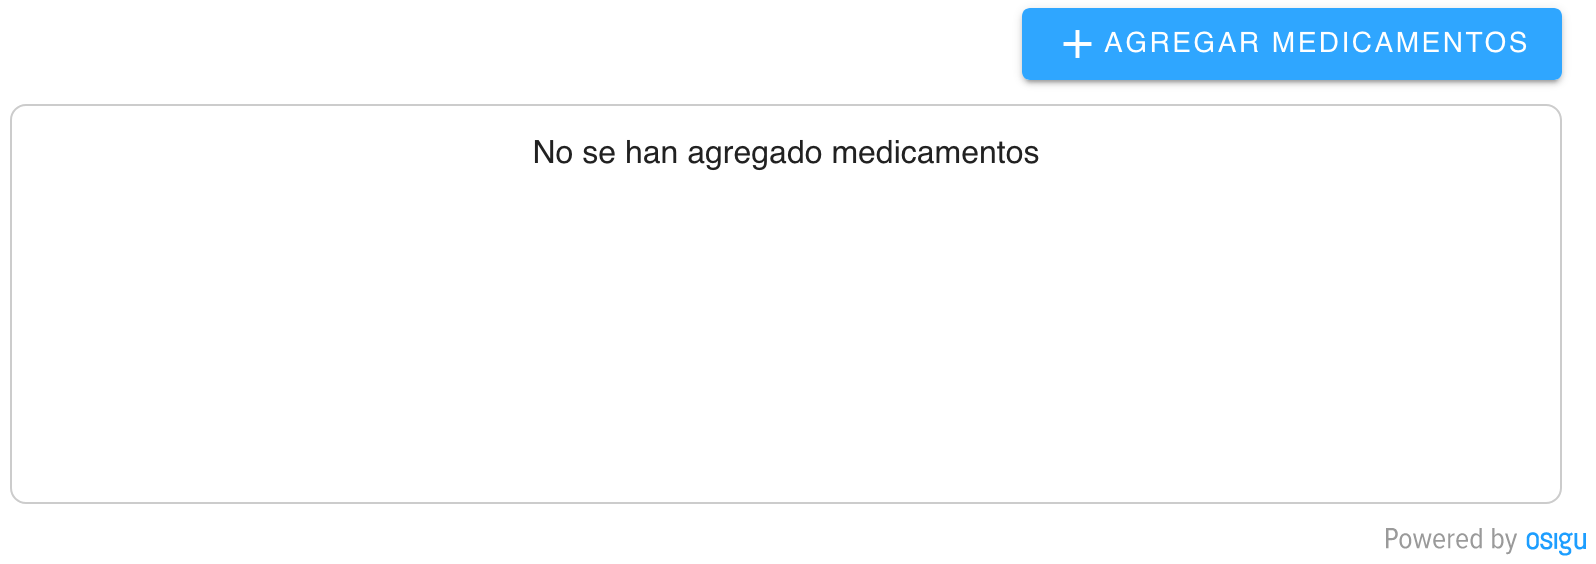
Once installed and configured, the widget will display a UI for adding products or services. For example:
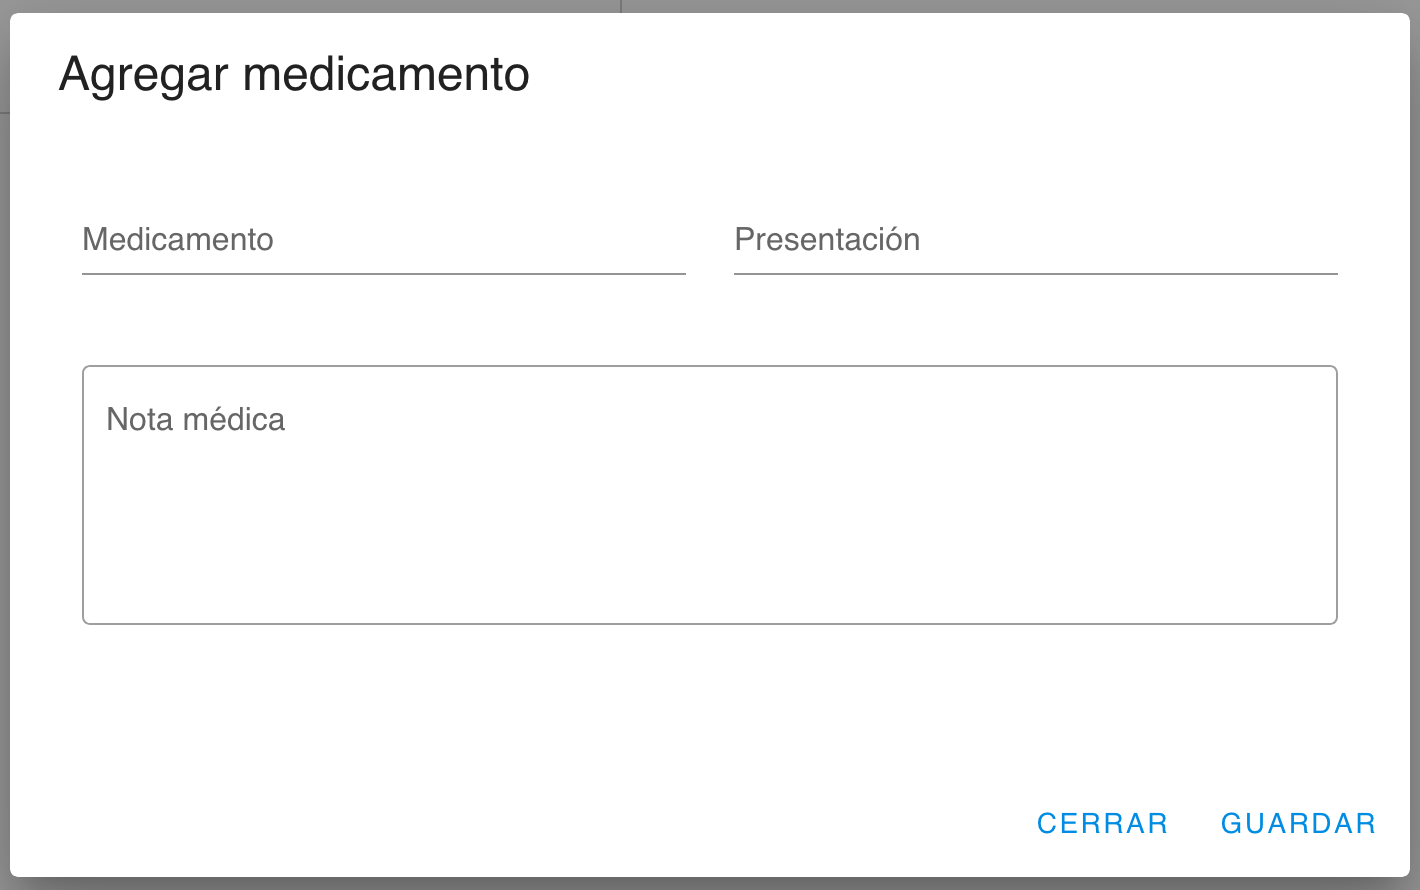
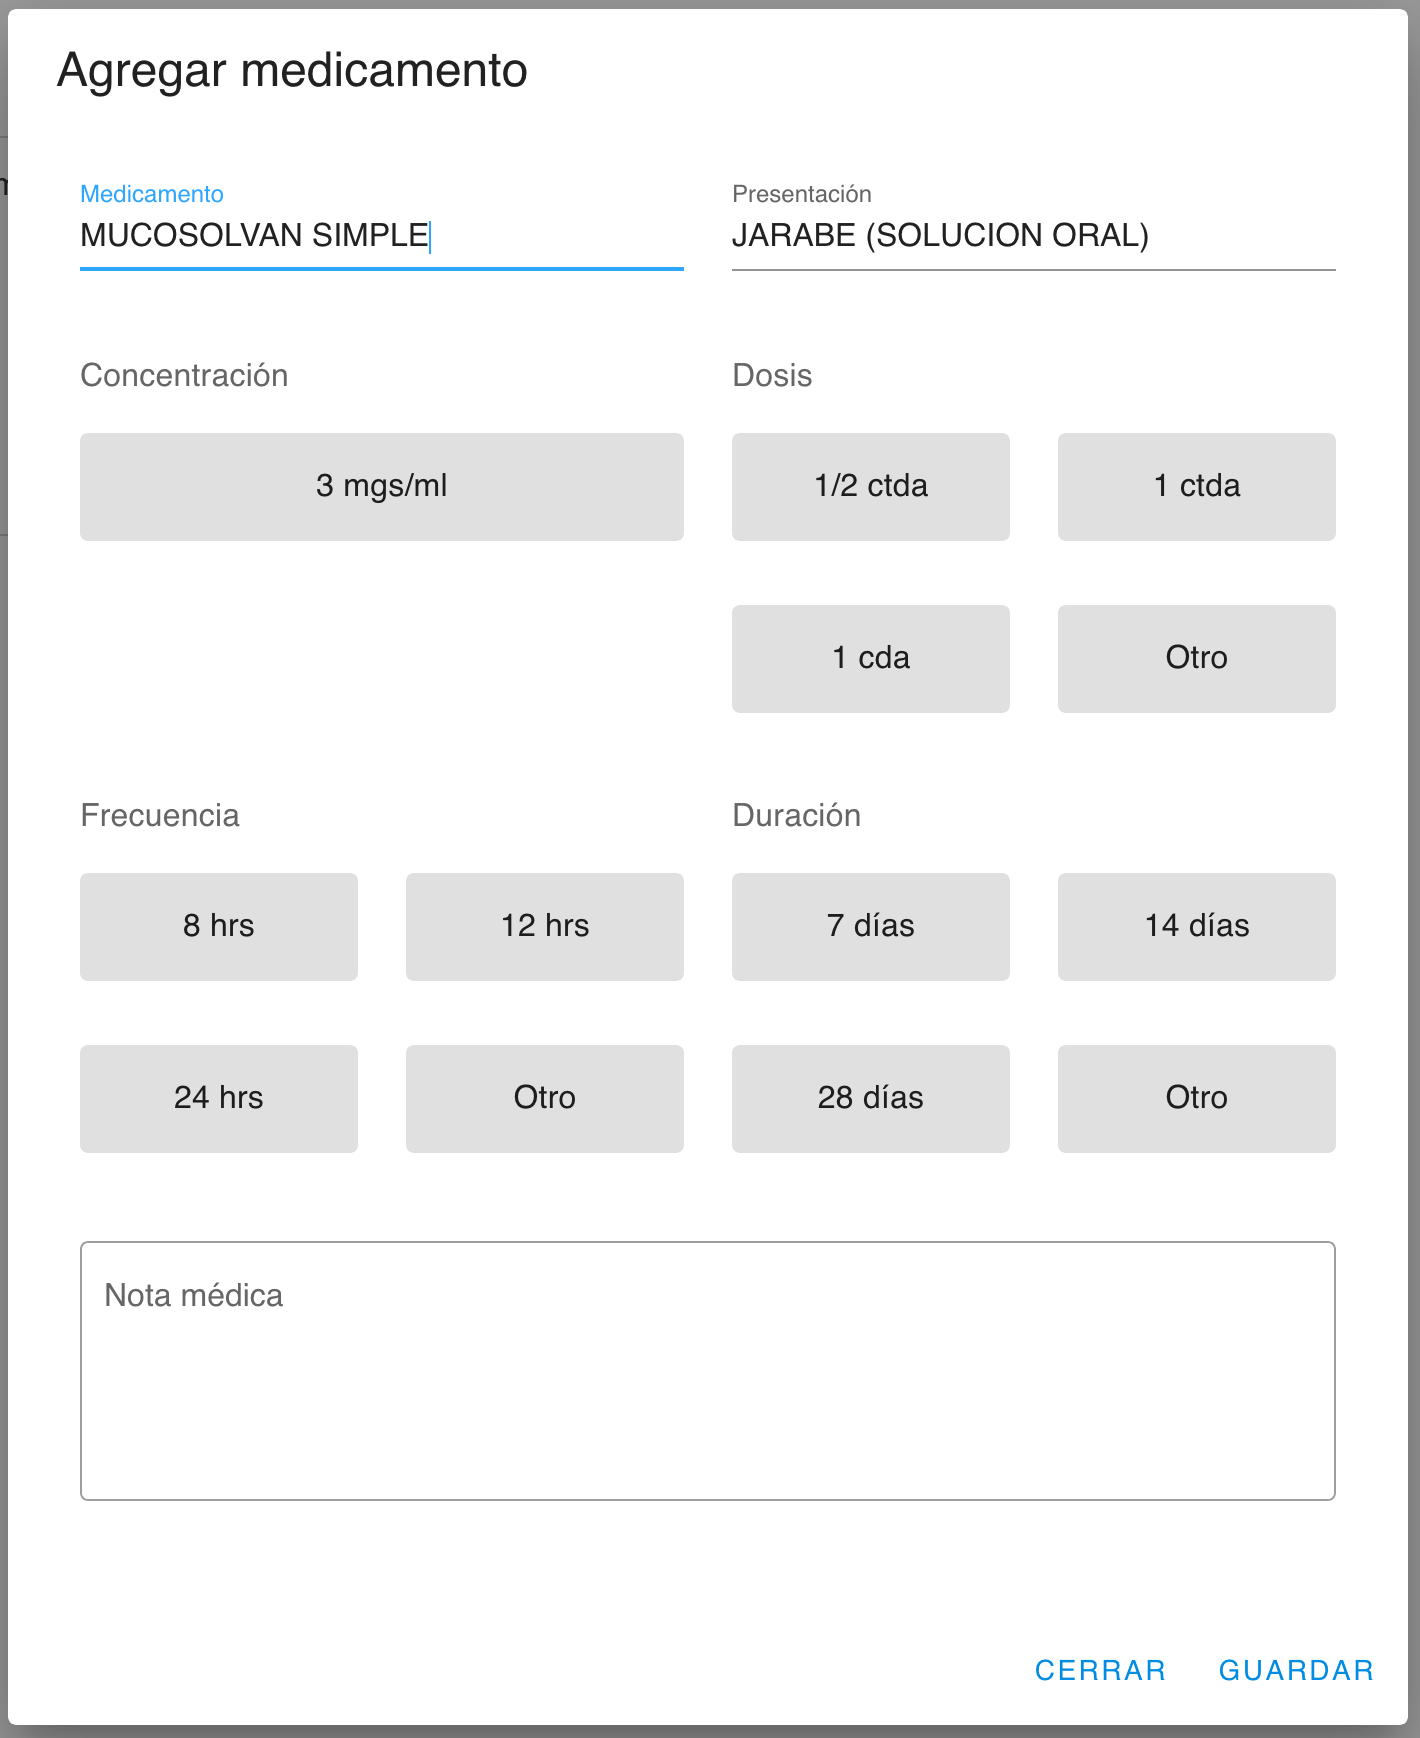
The "Add Medication" button opens a dialog for selecting and configuring medications. Users can input additional details like dosage, frequency, and duration:
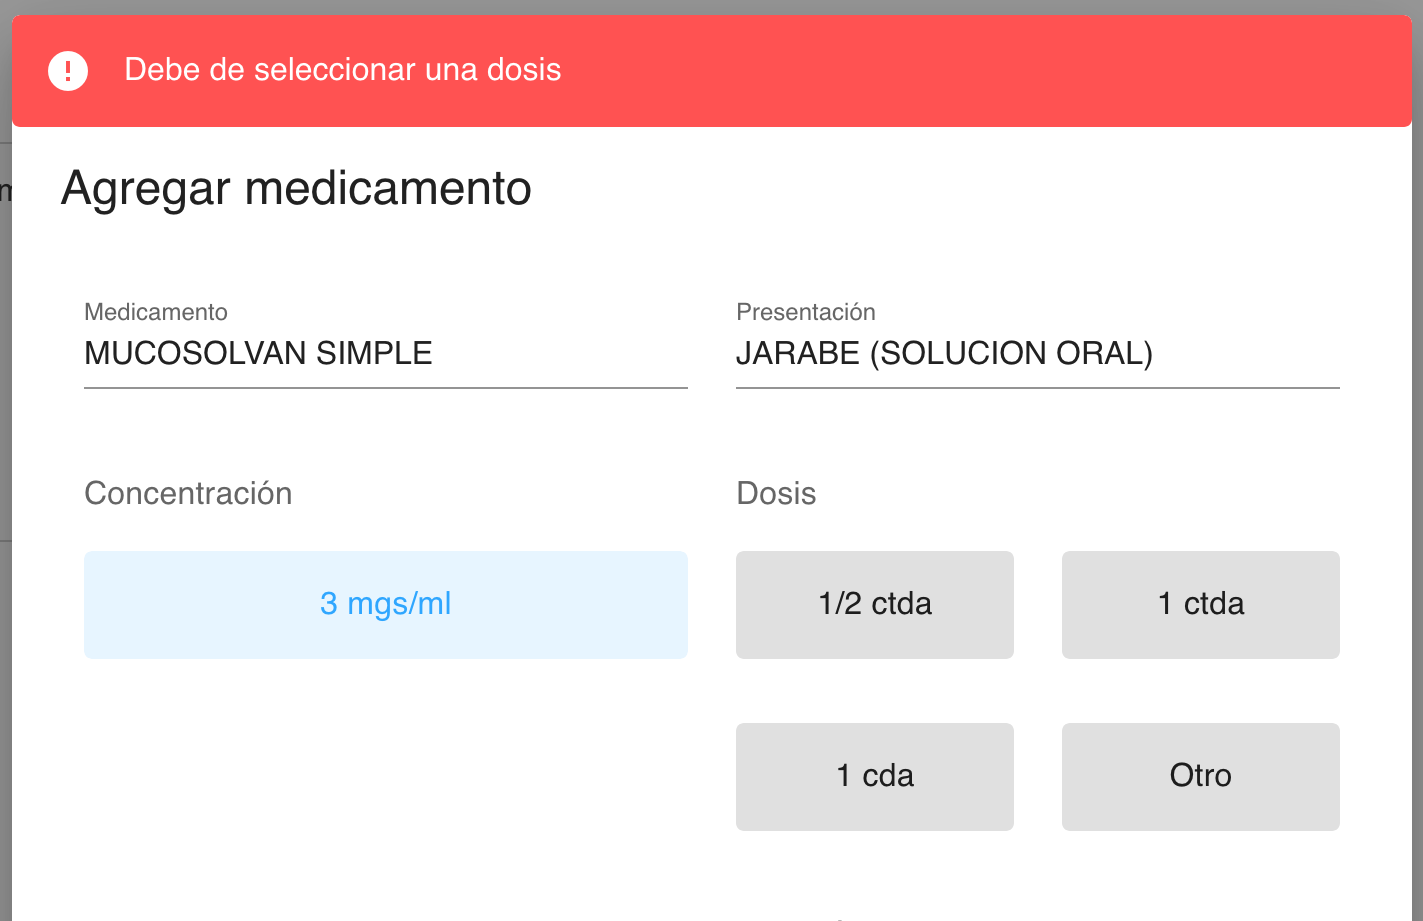
If required fields are missing, the widget will highlight them with an error message:
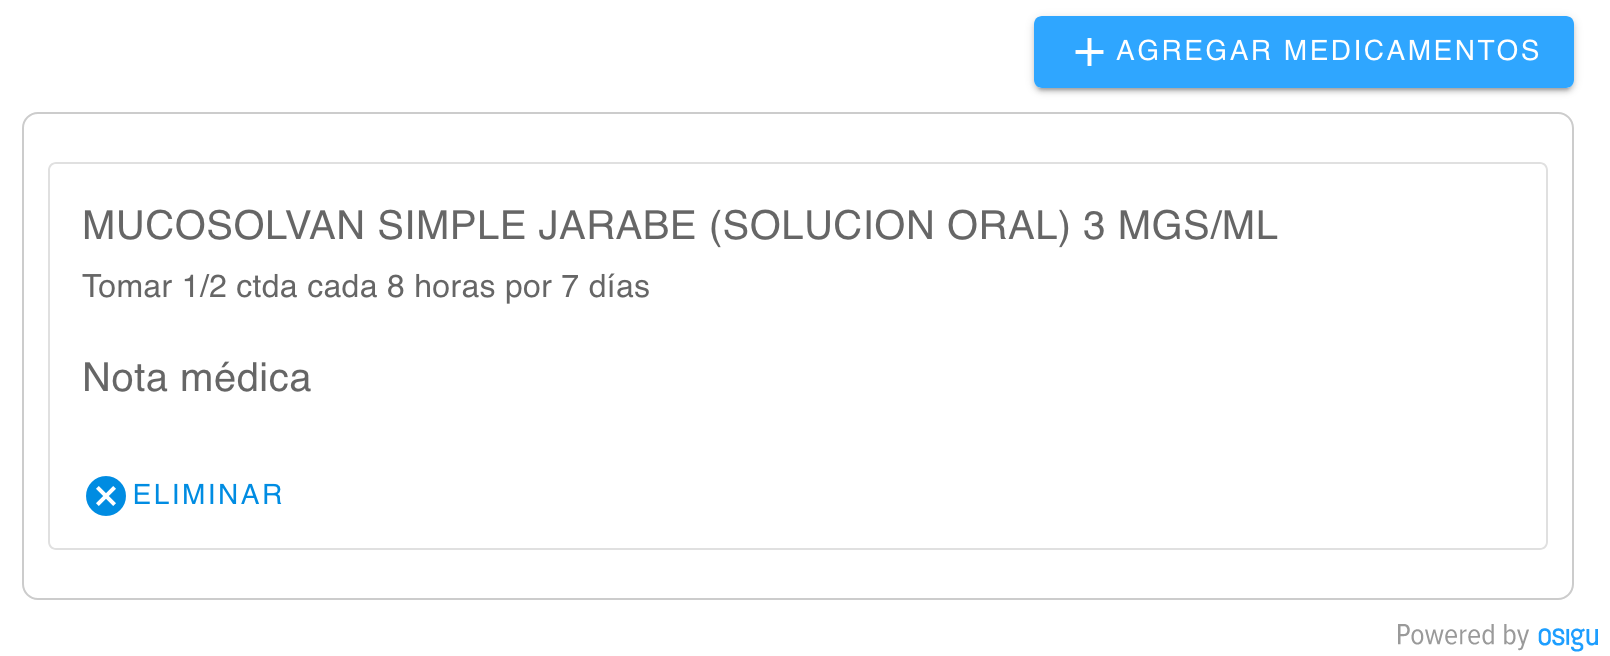
Once completed, the selected medication or service will appear in the main widget interface:
Events
The widget emits events when actions are performed. Two key events are triggered:
- onPreauthorizationItemAdded: Triggered when an item (medication or service) is added.
- onPreauthorizationItemDeleted: Triggered when an item is removed.
Example Event Listeners
const container = document.getElementById('widget_container')
container.addEventListener("onPreauthorizationItemAdded", function (e) {
  console.log(e.detail); // Prints "Example of an event"
});
1
container.addEventListener("onPreauthorizationItemDeleted", function (e) {
  console.log(e.detail); // Prints "Example of an event"
});
Event Attributes
onPreauthorizationItemAdded
- beneficiaryId: ID assigned by Osigu to the beneficiary.
- externalTransactionId: Transaction identifier from your system.
- treatment: Object containing the details of the treatment.
- product: For non-medication products, this contains product-specific details.
onPreauthorizationItemDeleted
- beneficiaryId: ID assigned by Osigu to the beneficiary.
- externalTransactionId: Transaction identifier from your system.
- treatmentId: ID of the treatment removed, which you can use to update your records.
- productId: For non-medication products, this ID helps you update your records accordingly.
Important Notes
Authorization Process: This widget does not issue an authorization. You must complete the payload and submit it to the Pre-Authorization API to generate a redeemable authorization.
Updated 8 months ago
